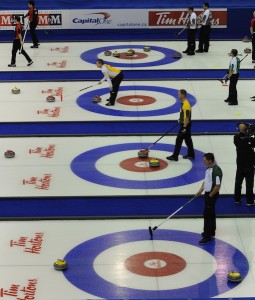
Making Great Ice: Circles and lines
The base of your curling ice is made, and the white paint is on and sealed in. Are you ready to paint the circles and run your lines?
Before you start painting circles, you will want to measure the rink dimensions again. If you are at a new club, this is a good idea even if the sheets are already marked out. It will just give you peace of mind that they are correct.
To measure the dimensions, always follow the CCA rule book. Measure the sheet of ice from one end to the other to find centre, then measure back both ways to mark your lines.
From centre, measure back 36 feet to get the leading edge of the hog line. From that mark, measure back to centre four inches to establish your hog line. From the leading edge of the hog line (closest to house) measure 21 feet. This will be your tee-line . From there, measure six feet, and that will be your back line. From your back line, measure six feet and that will be the leading edge of your hack (i.e. the front of the board the hack sits on).
If you have dividers in your rink, you will have to measure both sides of the sheet. If not, measure the other side of the rink. Always measure the same way from one side to the other. To find out if you are close to square, measure the diagonal from corner to corner, both ways. Subtract one measurement from the other. The difference shows how much out of square the ice surface is. For example, on a six-sheet rink with no dividers, a three- to four-inch difference is fine.
Let’s find centre so we can set our pins. Divide the sheet in half at both ends, and run a line from one end to the other. Run a line across the tee-line marks. Where the lines intersect is the centre of your house. Mark that spot and set your pins.
Whether you are painting or laying plastic circles, you will need to scribe so you will have a guideline for putting your circles down. Whatever your application is, be sure to take your time and do a good job because you will see these circles all season. If you are painting, follow manufacturer’s instructions as to application. It is your choice whether you use a paint stick, roller, or brush. Use whatever you find works best. The key to paint is to get good coverage and seal it in very well before you start to lay lines. I will seal my circles 20 or 25 times with a backpack spray can. The same applies to using plastic: you want to make sure you get a good seal to the ice with no air trapped underneath. If you are painting your hog line, make sure you seal it as well as your lines. If you are running four-inch tape, make sure you roll all the air out from underneath or it will leave a white mark on the tape when it freezes.
Once you have sealed the circles, you can now run all your lines. You should already be marked for all of them. When you have your lines run, seal them in really well as you don’t want to pull them up when you drag the hose over them.
Now you should be ready to do the final seals before the levelling floods. I can’t emphasize how important it is to seal everything in so you won’t pop your lines or cause your paint to run. I like to give it five or six seals before I start my levelling floods, adding more water with each seal. Remember to give your plant a chance to catch up so your seals freeze quickly.
Once you are done sealing, you can start your levelling floods. You want to carry enough ice so that you won’t have problems with your paint. On a level floor, an inch of ice is a good rule of thumb. Otherwise, do as much flooding as it takes to get the sheets level. A couple of tricks are to scrape down your high spots between floods, and always put enough water down so it flows before freezing. Between 100 and 120 gallons is good, no less though.
Good luck! Next time, we will cover prepping your ice for curling. And a final tip to all you curlers reading this: we don’t care if your feet are dirty, but your shoes had better be clean!


